Oversized/Large Format Rose:
Size of paper needed to make the project: 16"x20"
Approximate Crafting Time: 1 1/2 to 2 hours per flower
Make that awesome floral photo backdrop even better with a few oversized flowers in the colors and prints of your choice!
**As seen on KUTV 2 Fresh Living**


Learn More
- DCWV 16"x20" Jewel Cardstock STack
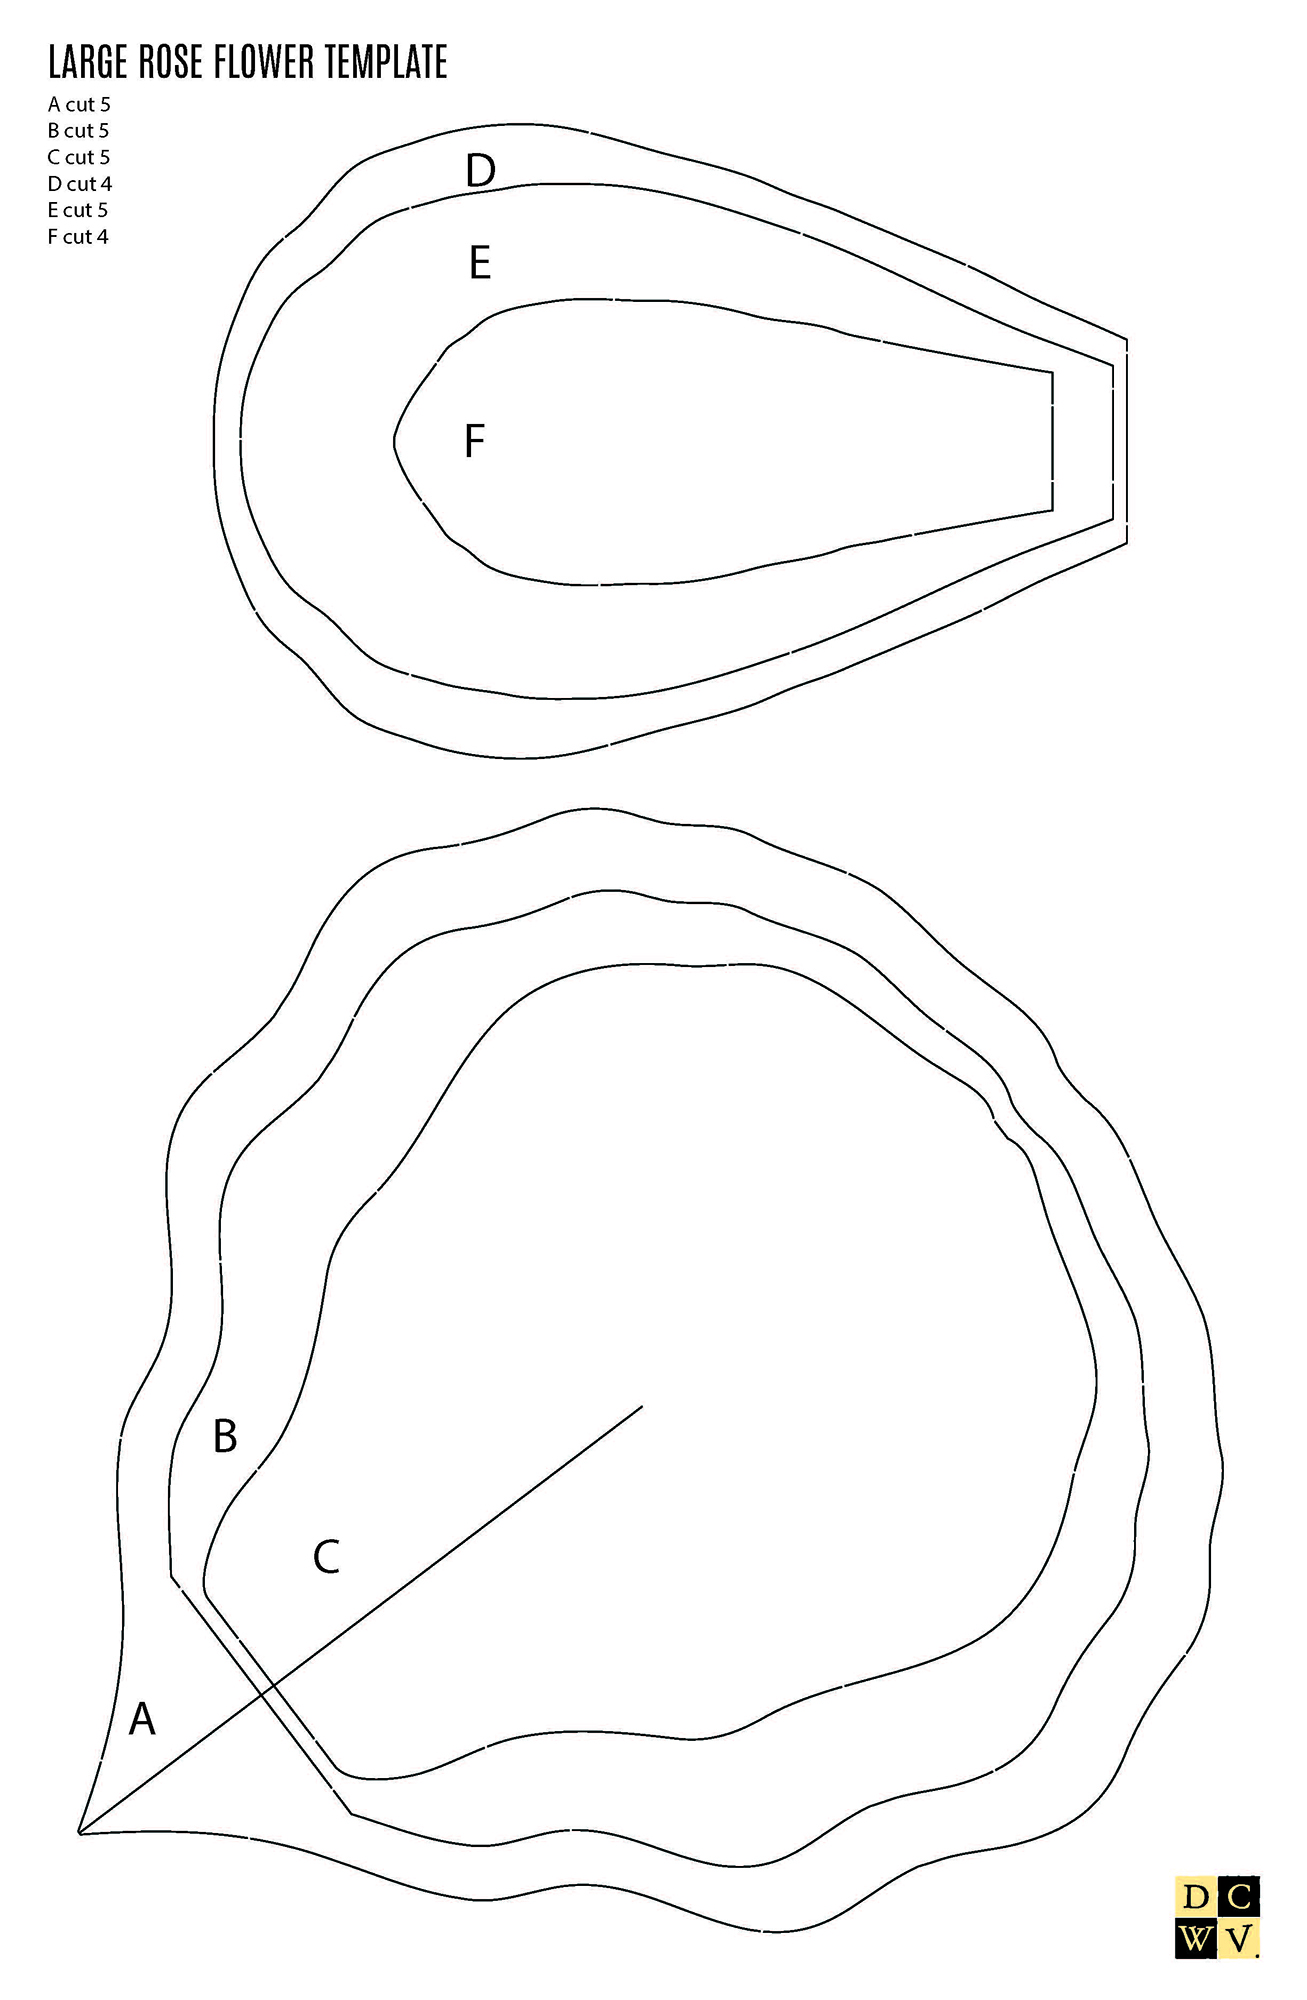
- DCWV Large Rose Flower template
- Ruler
- Hot glue gun
- Glue sticks
- Scissors
- Pencil
- Stapler
- Scissors
- Wooden Dowel (optional)
- Scoring tool (optional)
- Using a large format printer, print out the template 3 times onto 13"x19" sheets. Cut out all the pieces (A to F). Using the information on the template as a guide, trace and cut out the indicated amount of pieces needed to create 1 flower. Cut out an additional round piece for the base of the flower (approximately 8-10" in diameter).
- Once all the pieces have been cut out, roll each one around the dowel or along the edge of the craft table. This helps to loosen the fibers so that the petals can be sculpted easier into place. If desired, curl back the top edges as well to give it lifelike qualities.
- Prepare petals A, B, and C by crossing the smaller ends together and stapling them in place.
- Arrange the "A" petals loosely around the base (they should go out approximately 16" at the farthest points). Once a desired arrangement is achieved, adhere them in place.
- Add the "B" and "C" petals inside the flower, again arranging them until a desired look is achieved. Adhere them in place.
- Finish off the flower by adding in the other petals where desired, arranging them and then adhering them in place.
- Cut a 2” x 16" strip from an additional sheet of paper. “Fringe cut” the edges down 3/4” into the strip. Once this is done, roll the strip together from one end to the other, fringe side up. Glue this in the center of the flower and “fluff” as needed.
- Cut out a pair of leaves or leave as-is.
- On pieces A, B, and C, there needs to be a slit cut from the base almost to the center of each petal where the template indicates.
- Use care when rolling the petals around the dowel so as to not tear the paper—the goal is to soften the paper so that it bends more easily.
- If you want the flower petals to sit tighter against each other, then overlap the petals more. If you want the flower petals to sit more loosely, only overlap them a small amount.