


Extra special birthday cards for those we love
by Mitsyana Wright | 9 years ago

Hello, Crafty Friends!! And Hellllloooo, Autumn!! The weather has been absolutely beautiful. The sun shines and I don't break out into a sweat!! It's so nice to be able to walk out my door without melting! If you ask me, that right there... is pretty awesome!!
You know what else is pretty awesome?? Birthdays! Especially in October! My family has so many birthdays in October alone that it can make a person go broke trying to accommodate each and every person! Even if we did have one massive party for them all, it still would put a pretty big dent in the 'ol pocketbook! Yes, there are that many.
Today, I'm creating a card for one of those special birthdays... my mom's.
And you know, if you're making something for your mom it has to be extra special!
Supplies Used
Autumn Leaves Stack (DCWV)
Big Shot (Sizzix)
Anna Griffin Oval Rose Wreath w/ interchangeable Happy Birthday sentiment
(Cuttlebug/ Cricut)
Mega Runner (Xyron)Creative Station Lite (Xyron)
Flowers, Branches, & Leaves Set (Sizzix)
Premade Paper Flowers (Prima, Recollections)
Chalklets (EK Success)
Fantastix Applicators (Imagine Crafts/ Tsukineko)
Metal Embellishment
Gel Pen (Sakura)
Sanding Block
Glossy Accents (Ranger)

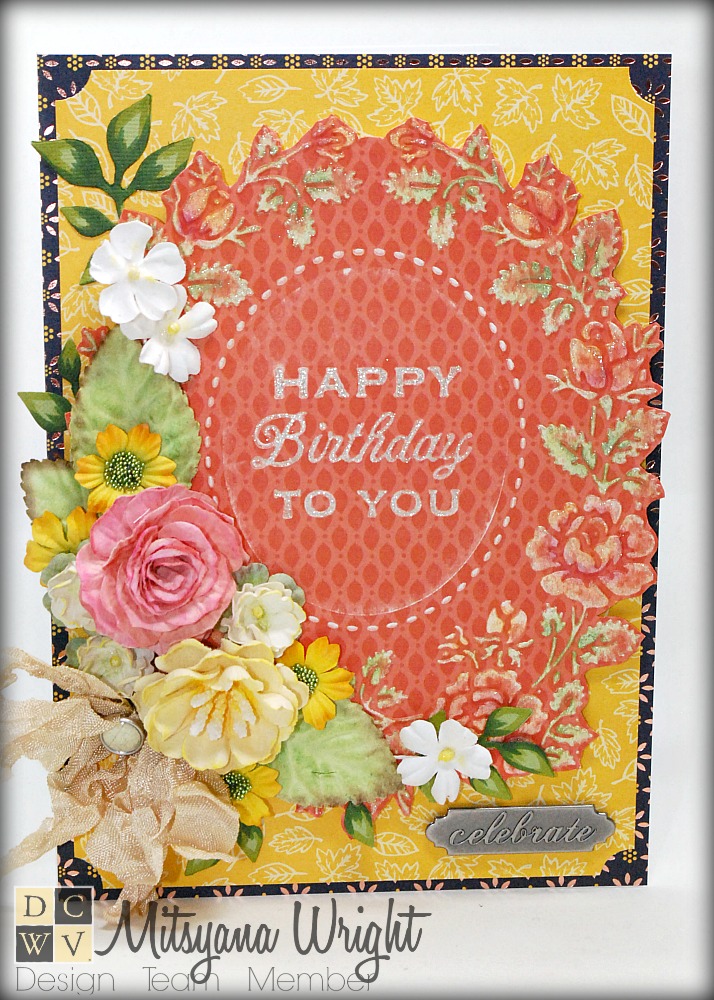
I started by cutting a piece of cardstock from the Autumn Leaves Stack, to measure 5"x7". I love the deep red-ish orange color of this paper! Actually, I love all the papers that come included in this stack... The patterned paper is simply beautiful! And patterns aren't "busy" like some patterned papers tend to be, which makes it great for embossing!!
Which is what I did with this piece of cardstock... I embossed it with this gorgeous Anna Griffin Embossing folder with an interchangeable center. The Folder is called Oval Rose Wreath and I used the 'Happy Birthday To You' interchangeable plates for my center. Then ran it through my die-cutting machine.

Once my paper was embossed, I took a sanding block and sanded off the surface of the raised image. Wow!! It's beautiful!! But I can't leave well enough alone...

Embossing paper is very beautiful but not many people know you can color an embossed image (without a stencil). After embossing, I leave the cardstock in place. This helps prevent the raised parts from flattening out. Then I rub chalk over the top of the raised image with a blending tool. I like using Fantastix applicators... they work a lot like an paintbrush and dauber, but morphed together. They are excellent for use with chalk!!
After I shaded my image with chalk, I highlighted my raised areas using a glitter gel pen. I outlined my flowers and leaves and traced over my sentiment in the center. This gives a very subtle shine that is just GORGEOUS!!

After the glitter ink dried, I decided to fussy cut my wreath out. The stripes were lovely but I just wasn't feeling them with this card.

I ultimately decided I wanted to add even more dimension. So, I made my own foam adhesive by running a piece of fun foam through my Xyron Creative Station Lite and attached it to the bottom of my wreath.

For my card base, I cut a piece of dark patterned paper to 5"x7" from the same Autumn Leaves Stack. This paper has beautiful copper foiling thoughout the page and of course is absolutely gorgeous!! I matted it with another coordinating piece of cardstock (also from the Autumn Leaves Stack), this one measuring 4.75"x 6.75".
I used a corner chomp to add ticketed corners to the card mat. I then used my Xyron Mega Runner and layered and attached the two pieces together.

I added pre-made flowers and leaves. I also added additional leaves that I die-cut from green cardstock and a double looped bow made from crinkle ribbon, and a little metal embellishment.
I attached the card front to a 10"x7" piece of white cardstock folded in half to create a 5"x7" card.
The finished card is stunning !!
I hope you all enjoyed my project for today... but more importantly, I hope my mother enjoys this birthday card made just for her!!
Happy Crafting!!
~ Mitsy
 0
0DCWV Inc. on Instagram
DCWV Inc. on Pinterest
Visit DCWV Inc.'s profile on Pinterest.DCWV Inc. on Facebook
Recent Posts
Popular Posts
Connect with Us!


