


Luminaries..er..um...treat boxes?
by Mitsyana Wright | 9 years ago

Hi, Crafty Friends!! Halloween is drawing closer!! And I'm here with team DCWV with these super cute and easy-to-assemble lantern treat boxes!!
OK, OK... I'll admit they were not originally treat boxes! They are actually mini luminaries from DCWV's DIY Project Stack: Luminaries!! But I just love it when we can find multiple purposes for the same products, don't you?!! And this stack is just that!!

They are amazingly simple to put together too!! All sheets included in this DCWV stack come pre-perforated and scored. All you need to do is punch them out!! No measuring or scoring!! WooHoo!! What a great time saver!

How did I do this? Here is a short list of steps to follow (and tips to remember):
- Windows and holes are still intact to keep the integrity of the shapes. So punch those out.
- Fold along the crease marks.
- For the the peak of the lantern, fold inward. (Think reverse milk carton spout).
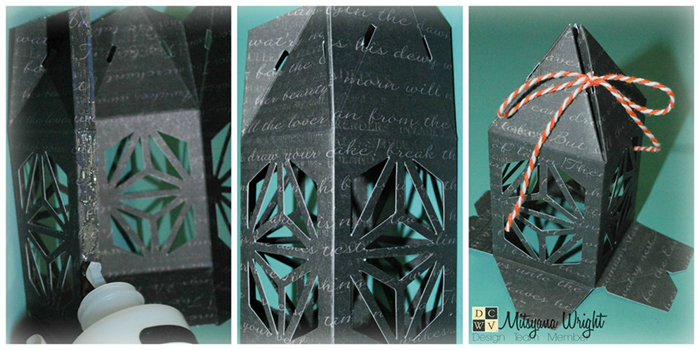
- Add clear glue along the side flaps and adhere them to the opposite edge to create a corner.
- Hold in place till the glue sets or clip in place to save on time.
- Once glue is set, string bakers twine through holes on top of the lanterns. Pull them close and gather, then tie a simple bow.
- Leave the bottom open to insert treats.

- Use a tag punch to cut out mini tags from Chalkboard paper.
- Write your message with a white opaque marker or pen.

You can fill these boxes with whatever treat you like, but I've found that these boxes fit bagged Oreos perfectly!! The shorter lanterns can fit 4, and the taller ones fit 6!
I like tying my cellophane bags closed with fishing line so the strings remain unseen. And here is the finished lantern treat boxes!!

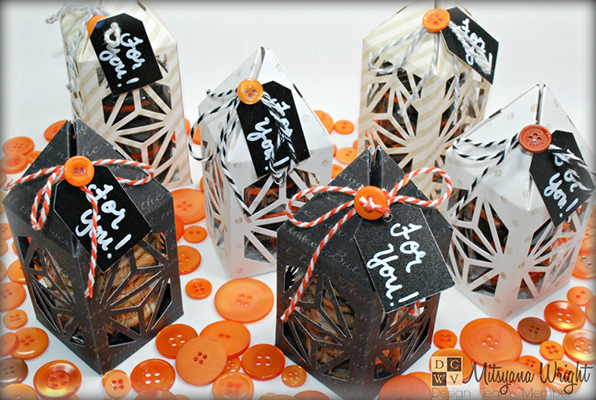
As you can see, these little luminaries are perfect to house sweet treats for sweet friends... Or use them traditionally! Either way, it makes for a very inviting display!!
I hope you enjoyed to today's project!!
Until next time... HAPPY CRAFTING, FRIENDS!!
 0
0DCWV Inc. on Instagram
DCWV Inc. on Pinterest
Visit DCWV Inc.'s profile on Pinterest.DCWV Inc. on Facebook
Recent Posts
Popular Posts
Connect with Us!


