


Premium Paper Gift Box Tutorial
by Lisa L | 11 years ago
Hello! Lisa here, from the DCWV Social Media Design Team! I’m so excited to be sharing a photo tutorial on how to create beautiful gift boxes for any occasion. I have used the new Premium Paper Collections; these can be found at your local Jo-Ann stores (as well as online!) and are ideal for creating the gift boxes. Why? Well, this paper is a must due to its sturdy paper weight, gorgeous designs, and the simple fact that they coordinate perfectly with each other. Let’s take a look at the box itself and then go into a tutorial on how it came together.

Photo Tutorial:
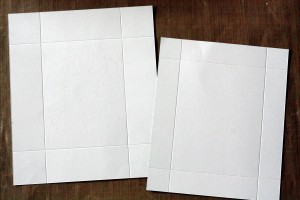
1. Trim Premium Paper: measurements for box: 6 3/4″ x 8″ and for the lid: 5 7/8″ x 7 1/8

2. Score the box sheet at 1 1/2″ on all sides and lid sheet at 1″ on all sides
3. Next make a cut on each flap and stop right where the two score lines meet as show in the picture
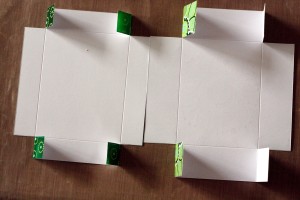
4. Add strong double sided adhesive on each flap
5. Peel the adhesive and fold all of the sides up to form your box and lid

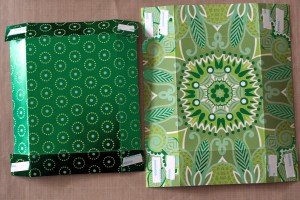
6. Now you can dress your box up as you would like. I chose to die cut a bow and adhered it to the top of my box


Making paper boxes is fun and it can give that extra personal touch to any gift.
Need something larger? Just change the measurements before cutting your paper so that the size of the box is the size you need. Here is one last photo showing a second box I had created using this same method, but with a different way to dress it up at the end. If you would like to see another tutorial on how to create paper boxes, click here and watch the tutorial on Splitcoast Stampers, as this is where I first learned how to make them myself.

Thanks so much for stopping by and Happy Crafting!
Lisa
 0
0DCWV Inc. on Instagram
DCWV Inc. on Pinterest
Visit DCWV Inc.'s profile on Pinterest.DCWV Inc. on Facebook
Recent Posts
Popular Posts
Connect with Us!


