


Summer Gift Bag!
by Beth Fiscus | 9 years ago
Good morning all! Beth from the DCWV Social Media Design Team here with you today with a summer gift bag tutorial.

1. Create gift bag using an SVG file. This one was from SVG Attic, but you could use nautical cut files and decorate any bag file you find. Paper used for the gift bag base is from DCWV’s Coastal stack (available at A.C. Moore stores).
2. Decorate bag with wave SVG files fit to width of your bag using various blue pearl papers from the Coastal stack. You may want to ink the edges of your cut files to add dimension and distinction as seen in the photos.
2. Decorate bag with wave SVG files fit to width of your bag using various blue pearl papers from the Coastal stack. You may want to ink the edges of your cut files to add dimension and distinction as seen in the photos.

3. Use a life preserver SVG file and papers from the Coastal stack (white is the flip side of the printed paper) and red from the Brights Border cardstock stack (available at A.C. Moore stores). Add a length of coordinating twine around the outside and adhere to front of bag using foam dimensionals.
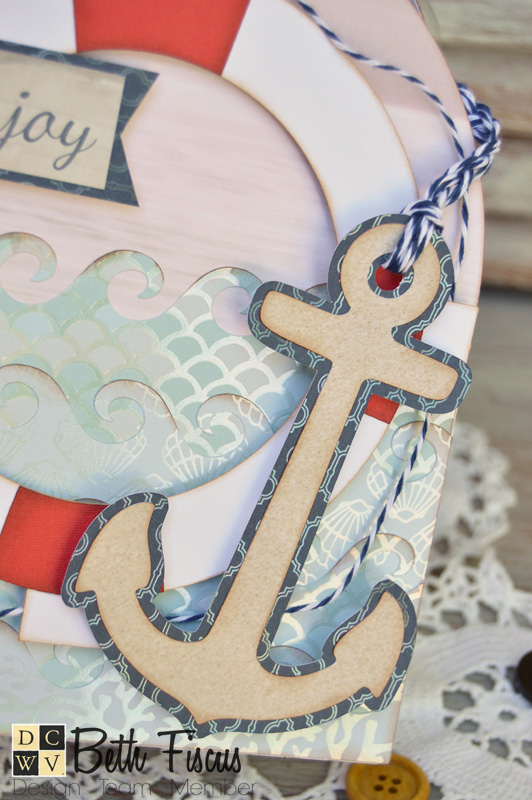
4. Cut an Anchor SVG file using papers from the Coastal stack. Adhere anchor layers together and string twine through the top of the anchor. Braid the tails of the twine. Adhere the anchor to the front of the gift bag with foam dimensionals. (Tip: The lower right side of the anchor will need two layers of dimensionals and the part that is on top of the life preserver will only need one due to the life preserver already being popped up.) Glue the ends of the braided twine to the inside of the bag.
5. Add layered Enjoy sentiment from Coastal stack on the front of the bag.
6. Embellish bag with wooden buttons using glue dots to adhere if desired.
I hope you have a wonderfully crafty day!

 0
0DCWV Inc. on Instagram
DCWV Inc. on Pinterest
Visit DCWV Inc.'s profile on Pinterest.DCWV Inc. on Facebook
Recent Posts
Popular Posts
Connect with Us!


